Northern Michigan Garden Maintenance, Renovation & Design
6829 Herkner Road Traverse City, MI 49685
13 Mar 2015

Top 10 Planting Design Tips

1. Try massing plants rather than having one of everything.repeat

2. Plant in odd numbers, though once you reach ten plants, you can ignore this rule.

3. Make a nice composition of plant forms. Add a little variety by mixing different forms, yet make sure you still have repetition.composition

4. Mix plant textures. Combine plants with large leaves and plants with small leaves to make your garden pop.

texture

5.  When choosing colors limit your choice by picking a theme (IE: monochromatic colors, complimentary colors, etc)

color

6. Consider all plant heights… especially those itsy bitsy plants (12″ or less) for the front row.  This make a great border.

border2

7. Consider winter interest too.  (Twigs, berries, bark and flowing grass)

winter

8.  Fill your beds with plants! This not only keeps down weeds, but makes your garden lush. Do you really want to look at empty planting beds.

fill

9. Layer your plants.  Why not even have two, three, or even five rows.

10. If you have a long border to fill, create a pattern with your plants.

Most importantly experiment and have fun.  If something doesn’t work out, try a new combination… until you fall in love with it.


10 Nov 2014

Clean The Rust

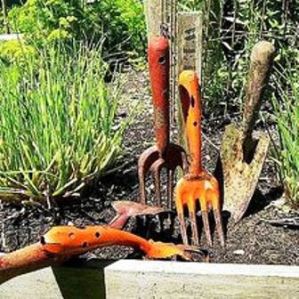
Tools-RustySometimes, often our garden tools get left outside. I know they should be cleaned and put away, but I just get so caught up in what I’m doing that I lose track of time. And since the work of a garden is never really done, I can always think of just one more quick thing to do before I go inside.  So, after some trial and error, I have come up with a super easy way to clean even the rustiest, most neglected of implements.

Now that the winter is upon us, what a better time to clean and sharpen those tools so they are all ready for spring… *sigh*!

Supplies:

  • Large Bucket
  • Vinegar
  • Water
  • Rubber Gloves
  • Rags
  • Steel Wool (optional)
  • Wire Brush (optional)
  • Linseed Oilor Mineral Oil
  • Penetrating Oil such as Liquid Wrench

How To:

  1. In the bucket, combine plain old white vinegar and water in approximately a 1:1 ratio.
  2. Place tools in the bucket, opening them up if applicable so that the cleaning solution makes contact with as much of the tools’ surfaces as possible. Let soak for 15 to 30 minutes.
  3. Remove one tool at a time and wipe firmly with the rag, re-wetting it with some of the cleaning solution if necessary. Rinse. For tools that don’t have much dirt and rust on them, this is all you will need to do to clean them – skip ahead to step 6. If quite a bit of rust still remains though, continue on to the next step.
  4. Put back into the bucket for a second 15 minute soak.
  5. Remove tools and scrub at remaining rust with steel wool and/or a wire brush. The wire brush is also useful for getting in around hinges and other tight areas.
  6. Rinse. Thoroughly wipe dry with a clean rag.
  7. Wipe down all metal parts of tools with linseed or mineral oil.
  8. Finish off by adding a dab of penetrating oil to hinges and moving parts.
  9. And voila ~ your tools are all clean and shiny (mostly anyway) and ready to use!